Getting started with ComfyUI
Introduction to ComfyUI
Getting started with ComfyUI opened up a whole new world of AI image creation for me. Unlike typing prompts into a text box and hoping for the best, ComfyUI lets you literally see how your image generation process flows together. Think of it like building with LEGO blocks – you can connect different nodes (the building blocks) to control exactly how your AI-generated images turn out. If you’ve ever felt limited by traditional text prompts, you’ll love how ComfyUI puts all the controls right at your fingertips through its visual interface. You can find everything you need to begin your journey on the ComfyUI GitHub page.
To get started, install git and visit the official GitHub repository: ComfyUI GitHub
System Requirements
Before installing ComfyUI, refer to the system requirement guideline to enure your system is capable of running ComfyUI.
Installing ComfyUI
For this tutorial we are going to install the portable standalone version of ComfyUI as it is easy to install and comes with a set of python library prerequisite that can be easily with just one line of short code.
Additionally, we will be following the installation method for NVIDIA GPU. For detailed installation instructions on AMD and intel GPU/CPU, refer to the ComfyUI GitHub repository.
Step 1: Direct Download
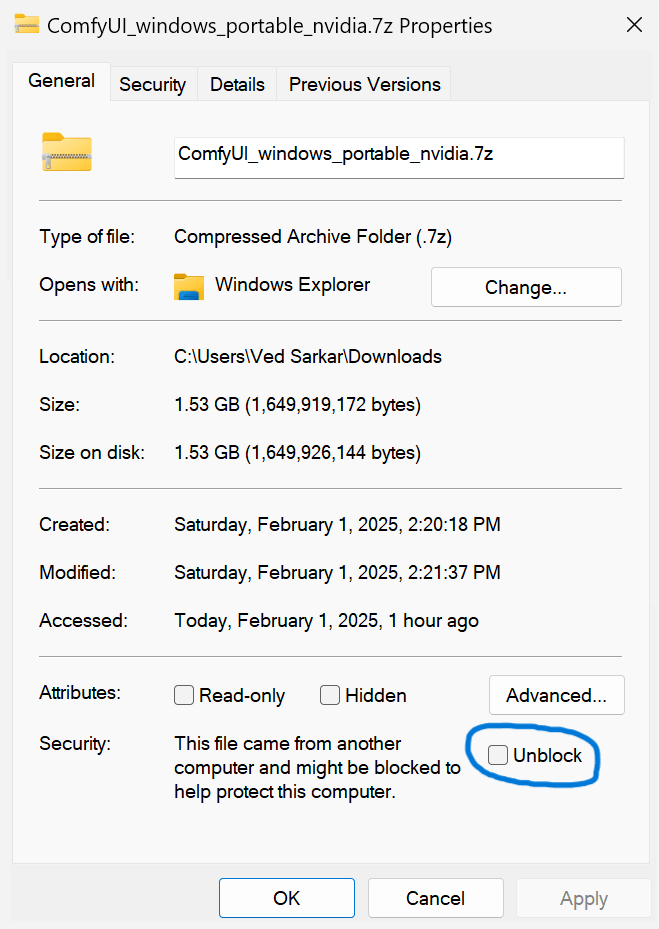
Simply download the ComfyUI Portable file for, extract with 7-Zip and run. If you have trouble extracting it, right click the file -> properties -> unblock
How do I share models between another UI and ComfyUI?
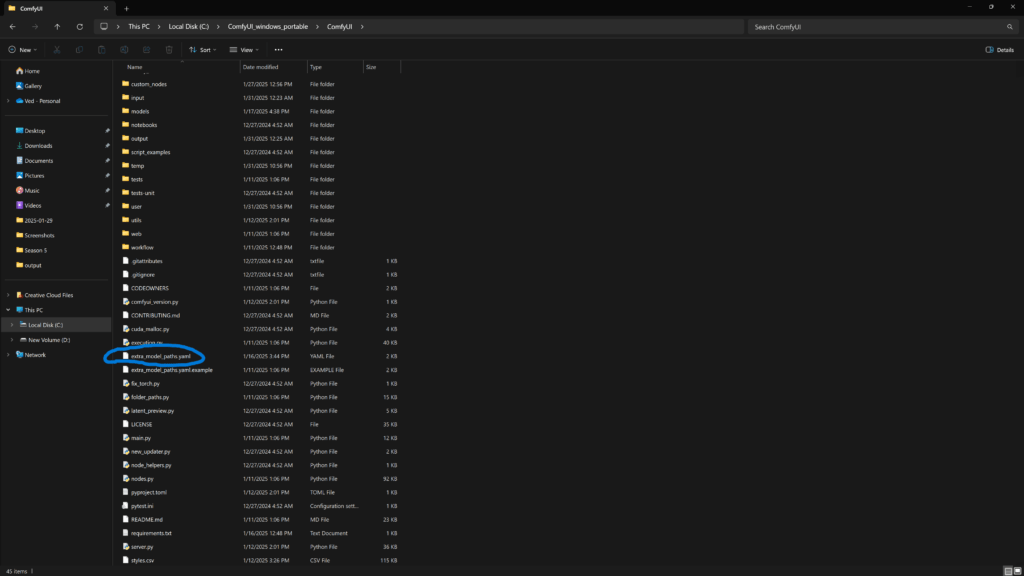
If you are already using any other GenAI tool for Stable Diffusion, Such as A1111, ComfyUI can easily be set up to use the existing models without any hassle. You navigate to ComfyUI directory and check for the file extra_model_paths.yaml, first rename the file and then add the location of the models’ folder using your favorite text editor.
Step 2: Install Dependencies
Nvidia users should install stable pytorch using this command:
pip install torch torchvision torchaudio --extra-index-url https://download.pytorch.org/whl/cu126Install the dependencies by opening your terminal inside the ComfyUI folder and:
pip install -r requirements.txtStep 3: Run ComfyUI
Doble click run_nvidia_gpu.bat
This ui will let you design and execute advanced stable diffusion pipelines using a graph/nodes/flowchart based interface. For some workflow examples and see what ComfyUI can do you can check out: ComfyUI Examples
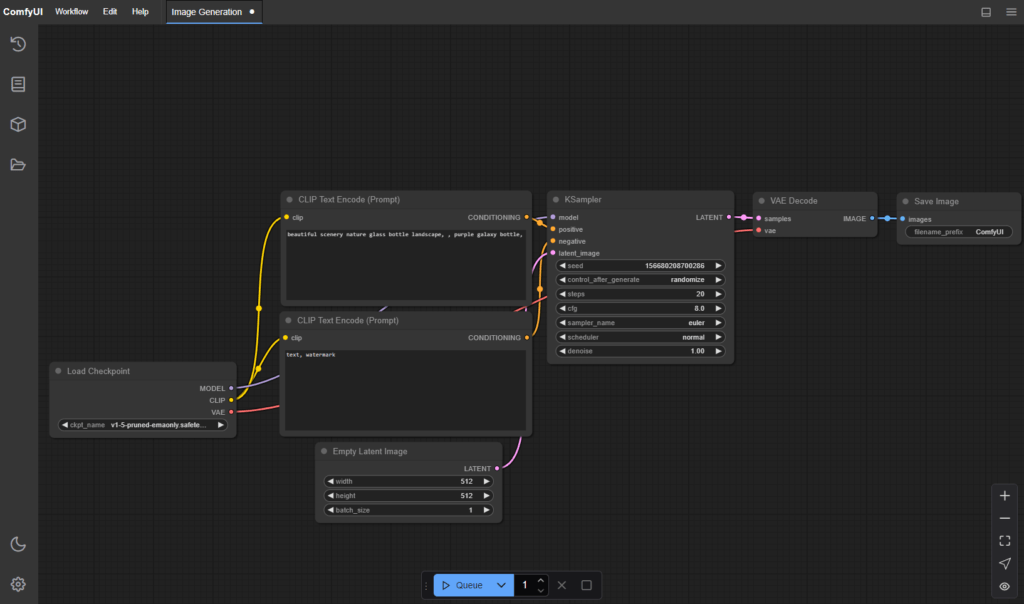
Understanding ComfyUI Nodes
At a first glance the node with all the connections can be intimidating but trust me once you get a knack of the it, create and customising of workflows become an intuitive process. For the starter, let’s go through what each node in the workflow contributes to the image generation pipeline:
Load Checkpoint
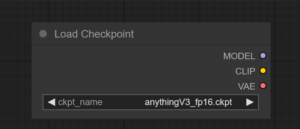
Loads the Stable Diffusion model (ckpt/safetensors file) that defines the image generation process.
CLIP Text Encode
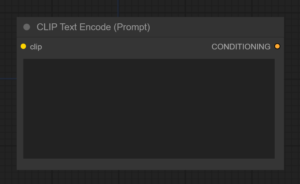
Encodes the text prompt into a format that the model can understand, guiding image generation. Based on the checkpoint being used, you can have Positive and Negative CLIP Text encode or just one Positive CLIP Text encode.
Empty Latent Image
Creates an empty latent space to define the image dimensions before passing it through the model. Basically, this node dictates your image resolution.
KSampler
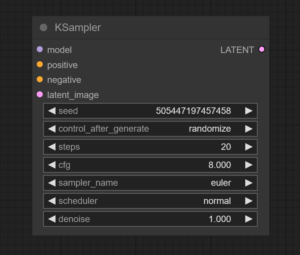
The core of the pipeline, this node performs the iterative sampling process to generate the image based on input prompts and model parameters. Playing with seed and other parameters can drastically change the output of the prompt.
VAE Decode
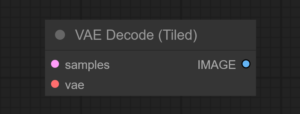
Converts the processed latent image back into a visible image.
Save Image
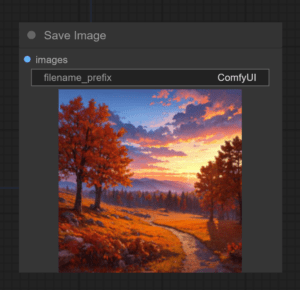
Saves the final generated image with a specified filename prefix.
The real magic happens when you start connecting these nodes in your own unique way – think of it as crafting your personal recipe for AI art. I’ve spent countless hours experimenting with different combinations, and I’m still amazed by the stunning results that emerge. Whether you’re aiming for photorealistic masterpieces or abstract wonders, don’t be afraid to experiment – that’s how you’ll develop your own style and create images that truly stand out.
Conclusion
As I wrap up this guide, I can’t help but get excited about what you’ll create with ComfyUI. It’s more than just another AI image tool – it’s your creative sandbox where every node tweak and connection brings you closer to your artistic vision. I started just like you, experimenting with different settings, and each discovery felt like unlocking a new superpower. Whether you’re just dipping your toes in or you’re ready to dive deep into advanced workflows, ComfyUI grows with you. So go ahead, start playing around – you might surprise yourself with what you create!
Comments are closed.